Adjusting a water pressure regulator is an essential task for maintaining the optimal water pressure in your home’s plumbing system. A water pressure regulator, also known as a pressure-reducing valve (PRV), is designed to control the water pressure flowing from the main water line into your home. Too high pressure can cause damage to plumbing fixtures, lead to leaks, and unnecessarily increase water consumption, while too low pressure can affect the functionality of your household water system. This article provides a comprehensive guide on how to adjust your water pressure regulator to ensure your home receives water at the right pressure.
Understanding Water Pressure Regulators
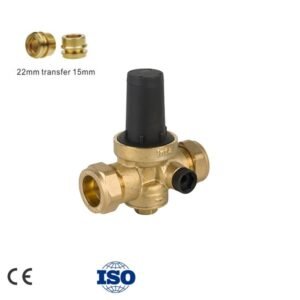
Water pressure regulators are typically installed where the main water line enters the home. These devices are critical in reducing the high pressure from the municipal water supply to a more manageable and safer level for your home. The standard water pressure for residential buildings is between 40 to 60 pounds per square inch (psi). Regulators consist of a spring and diaphragm that adjust the flow of water to maintain a steady pressure level, despite fluctuations in the incoming water supply pressure.

Signs You Need to Adjust Your Water Pressure Regulator
Before adjusting your water pressure regulator, it’s essential to identify signs that suggest an adjustment is necessary:
- High Water Pressure: If you notice that water is coming out of faucets too forcefully, or if you hear banging noises in the pipes (a phenomenon known as “water hammer”), it may indicate that the water pressure is too high.
- Low Water Pressure: If water flow from faucets is weak or takes a long time to fill appliances like your washing machine or dishwasher, you might be dealing with low water pressure.
- Leaks: Unusually high pressure can lead to leaks in your plumbing system, as pipes and fixtures can only withstand a certain amount of pressure.
- Water Pressure Fluctuations: If the water pressure in your home fluctuates between too high and too low without a clear reason, the pressure regulator might not be functioning correctly.
Tools You’ll Need
- Adjustable wrench
- Pressure gauge (to test water pressure)
Step-by-Step Guide to Adjust Your Water Pressure Regulator
Step 1: Locate Your Water Pressure Regulator
The first step is to locate your water pressure regulator. It’s usually found where the main water line enters your home, often in the basement or a utility area.
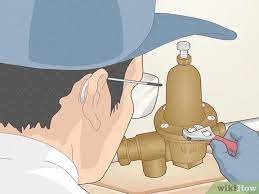
Step 2: Test Your Current Water Pressure
Attach a pressure gauge to a faucet near the water meter or the regulator. Ensure all other faucets and water-using appliances in your home are turned off. Turn the faucet on fully to get a pressure reading. This will give you a baseline of your current water pressure.
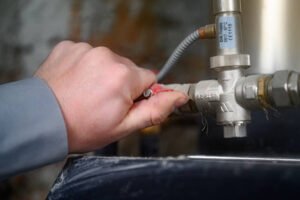
Step 3: Loosen the Locknut
Before making any adjustments, you’ll need to loosen the locknut on the regulator. Use an adjustable wrench to turn the nut counterclockwise just enough so that you can adjust the pressure setting.
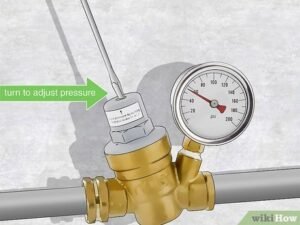
Step 4: Adjust the Pressure
To adjust the pressure, turn the screw on the top of the regulator with your wrench. Turning the screw clockwise will increase the pressure, while turning it counterclockwise will decrease the pressure. Make small adjustments, then recheck the pressure using your gauge.
Step 5: Recheck the Water Pressure
After making adjustments, recheck the water pressure by attaching the pressure gauge to the faucet again. Turn on the water and observe the reading. Adjust the regulator as necessary until you reach the desired pressure.
Step 6: Tighten the Locknut
Once you’ve adjusted the regulator to the desired pressure, tighten the locknut by turning it clockwise with your wrench. This will secure the adjustment screw in place.
Step 7: Monitor and Adjust as Needed
It’s a good idea to monitor the water pressure periodically and make adjustments as needed. This ensures that your home’s plumbing system operates efficiently and safely.

Tips for Success
- If you’re uncomfortable making these adjustments yourself, consider hiring a professional plumber.
- Regularly inspect your water pressure regulator for signs of wear or damage. A failing regulator can cause sudden changes in water pressure.
- Consider installing a water pressure gauge permanently somewhere in your plumbing system for easy monitoring.
Conclusion
Adjusting your water pressure regulator is a straightforward process that can significantly impact the longevity of your plumbing system and the efficiency of water use in your home. By following the steps outlined above, you can ensure that your home receives water at a safe and consistent pressure. Regular checks and adjustments will help maintain the optimal performance of your water pressure regulator, ultimately safeguarding your plumbing fixtures and reducing the risk of leaks or damage.